Category: Recipes (Page 5 of 26)

Meal Kit Review: Plated’s Seared Steak with Blue Cheese Butter and Spinach-Beet Salad

Rating 9/10

This image has an empty alt attribute; its file name is IMG-1753-e1549777739853.jpg

After writing a whole post reviewing this Plated meal kit for Seared Steak with Blue Cheese Butter and Spinach-Beet Salad, I realized that I had started a review the very night I made it. So I’m incorporating what I wrote then here:

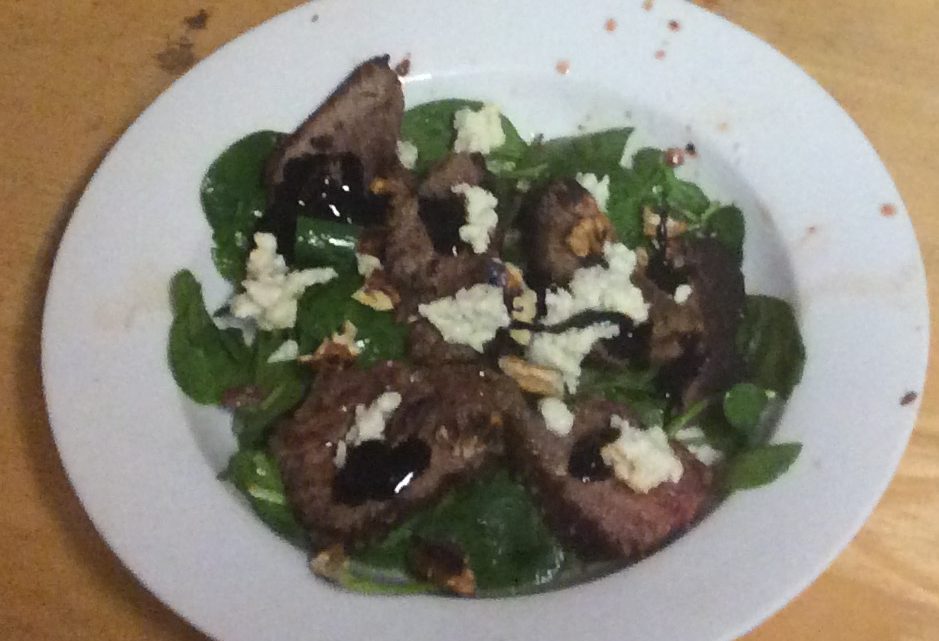
I am impossibly backed up with all the meal kit reviews I need to review, but I can’t help but start with the one I made tonight: Plated‘s Seared Steak with Blue Cheese Butter and Spinach-Beet Salad. It was absolutely delicious – and a very quick recipe to make to boot.

I’m amazed at the simplicity of it:  fresh baby spinach tossed with olive oil and salt and topped with beef sirloin slices, toasted pecans, blue cheese butter (a mixture of just blue cheese and butter) and a packet of balsamic glaze.  There were also supposed to be seared sliced beets, but no one in my family likes beets so I skipped them (I’m thinking of using them to make an amuse bouche for my Christmas Eve dinner).

But all the flavors together – including the juice from the beef – were just magical.  They worked to contrast and compliment each other.  I definitely have to make this myself, though that means making my own balsamic glaze, which is easy, but time consuming.  If I find commercial balsamic glaze, I may even make this very simple salad for Xmas Even dinner.

The meal wasn’t perfect, however.  While most of the spinach was nice and crispy, some of the leaves had started to wilt.  Given that I only received my box yesterday, I’m not sure the spinach would have survived if I’d taken longer to make this kit.

Another problem was that the two steaks were terribly different in thickness – one was twice as think as the other, which made cooking them at the same time difficult.  This is not the first time I’ve encountered this problem and I wish meal kit companies would be better at this.  The beef, however, was very good quality and very tasty.

Finally, I don’t think the portion was large enough for an adult.  Perhaps it would have been if I had included the beets, but I’ve found that many of the meal kits that don’t include a carb leave me hungry.

I paid $8 for this kit for 2 people, using a $40-off Black Friday promo.

Meal Kit Hack: Coq au Vin with Bone-In Chicken & Mashed Potatoes

Rating: 7/10

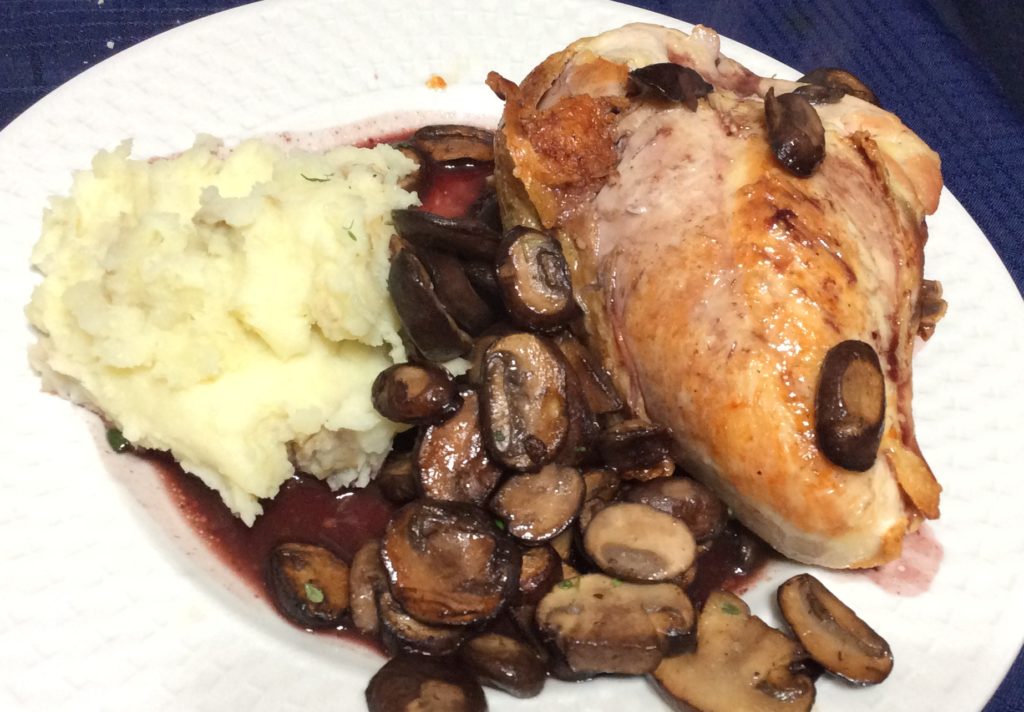
I didn’t get any meal kits this week, so I decided to hack a Home Chef recipe for dinner. I wanted something with chicken, as I’m trying to eat less beef, and this one seemed simple enough. I love coq au vin (which I haven’t made in a while). and while, obviously, you can’t make coq au vin in an hour, I was willing to give this recipe for Coq au Vin with Bone-In Chicken & Mashed Potatoes a try.

This image has an empty alt attribute; its file name is IMG-1828-e1549771661528-1024x712.jpg

Alas, once I started making it, I realized there wasn’t much to it: you make mashed potatoes, you sear and then bake the chicken, you sautee the mushrooms and pearl onions, you make the 2-two ingredient sauce and voila!

The results were good, but not great – though that may be because I actually used chicken breasts instead of the thighs I prefer and because I didn’t make enough sauce for the massive breasts I got (lord, that sounds dirty!).

The sauce, which was tasty enough, consisted of 2 tsp of chicken demi-glace dissolved in 5 oz of red wine. I used beef demi-glace, as I didn’t have the regular kind.

I also didn’t use pearl onions because Safeway failed to deliver them to me.

In all, I spent $20 to make this meal, which actually fed 3 of us with leftovers (those were really big chicken breasts) – so about 1/3 less of what the meal kit would have cost.

I also went out of my way to look for “antibiotic-free” chicken, only to find out that California passed a law to ban the use of growth-promotion antibiotics in chickens. Antibiotics can only be used if a veterinarian prescribes them to cure a specific ailment. So it would seem that any “antibotic-free” designation on chicken raised in CA is just for advertising purposes. I had wanted to see if antibiotic-free chicken tasted better than regular chicken, and obviously I found out it didn’t.

I did find out, though, that searing the chicken skin-side-down for a couple of minutes and then baking it at 400F, leaves you with a very nice crispy chicken skin.

Meal Kit Review: EveryPlate’s BBQ Pork Sloppy Joes

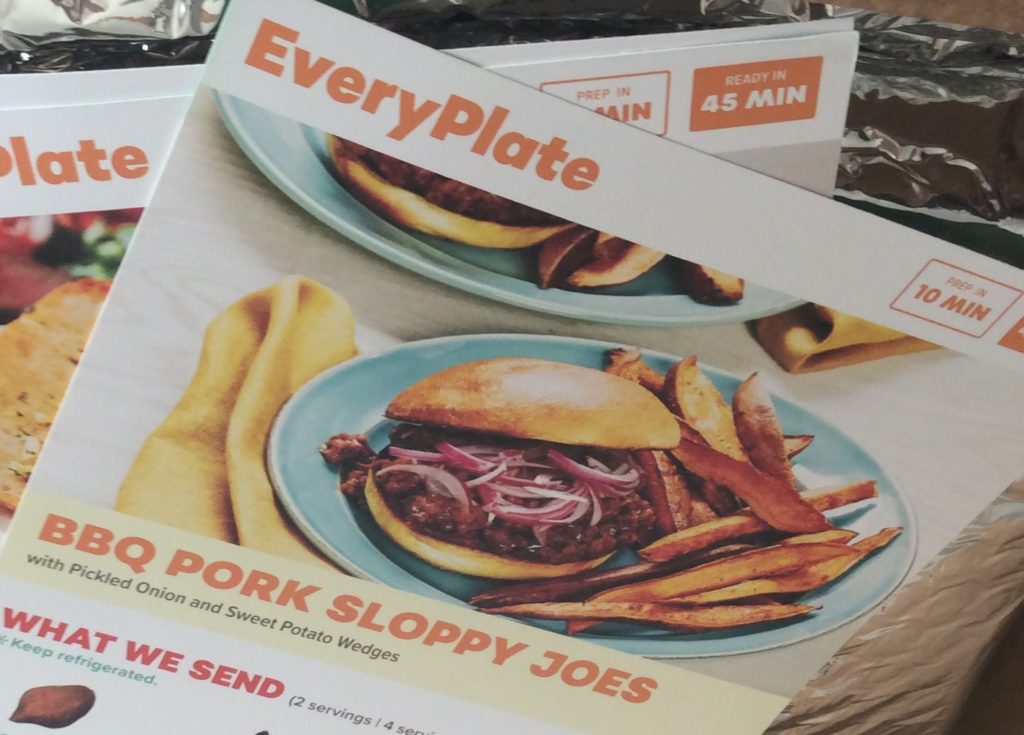
everyplate sloppy joes
I didnt manage to take my own photo when I made these.

Rating: 7/10

Sometimes a meal kit fails you, and sometimes you fail a meal kit. This time I think both of us failed each other. I think this could have been a pretty good meal kit if I’d had all of the ingredients, and if I had been more careful while putting it together. As things were, my husband got a decent sandwich – but not really a sloppy joe – and I got to eat the remaining filling with a spoon. At least it was pretty tasty.

This EveryPlate kit consists of ground pork which is supposed to be cooked with BBQ sauce and ketchup, potato buns, an onion to quickly pickle and sweet potatoes to bake. One of the two packets of BBQ sauce my kit came with was open, so I had to toss it away. Unfortunately, when I went to make the pork, I realized I didn’t have any more BBQ sauce at home. Even worse, the kit called for using my own ketchup – and I was also out of it. At the end, I was only able to cook the ground pork in a the single packet of BBQ sauce. Amazingly, this still gave a very nice flavor to the pork.

I didn’t try the pickled onions, but my husband raved about them. I’m thus including the recipe below.

As for the buns, I burnt my first two when I put them in the toaster – and then dropped them (thus my lack of a sandwich myself). I also managed to burn the sweet potatoes. Indeed, one of the things that did not work with this kit is that the sweet potatoes require that you preheat the oven (something which takes at least 15-20 minutes) and then you cook them for 20-25 minutes. The rest of the meal takes a very short time to make. So we were ready to eat far before the sweet potatoes were ready – which is why I forgot about them.

I got this kit for free, with a special one-time code that someone gave me. The regular cost for the two serving kit is $13, including shipping. Use this link to get $20 off your first box.

Quick Pickled Onions

  • 1/4 cup thinly sliced red onion
  • 1/4 tsp sugar
  • juice from one lime
  • pinch of salt

Combine all ingredients in a bowl. Let to pickle for at least 10 minutes.

Sloppy Joes

  • drizzle of oil
  • 1 red onion, chopped
  • salt & pepper to taste
  • 3 cloves garlic, minced
  • 1 lb ground pork
  • 1/3 cup BBQ sauce
  • 1/4 cup Ketchup
  • 1/3 cup water
  • 1 tsp lime juice

Heat oil in a large saute pan over medium-high heat. Add the onion, season with salt & pepper, and fry, stirring frequently, until soft – 4-5 minutes. Add the minced garlic and cook for 30 seconds. Add the ground pork and cook, stirring and separating, until browned, about 4-5 minutes. Add the bbq sauce, ketchup, water and lime juice. Cook, stirring frequently, until it thickens. Taste and adjust seasoning. Serve in burger buns topped with the pickled onions.

Meal Kit Review: EveryPlate’s Steak Tagliata

Rating: 8/10

This image has an empty alt attribute; its file name is IMG-1820-1024x765.jpg

Last week I tried EveryPlate meal kits. At $39 a week for three 2-serving meals, it’s one of the cheapest services out there – though when shipping is included each portion is $6.50, not the $5 they advertise. Premium dishes (those including steak, I’m guessing) are $3 more pp, or $9.50. My first week was free, as I got a one-time promo code from a current user.

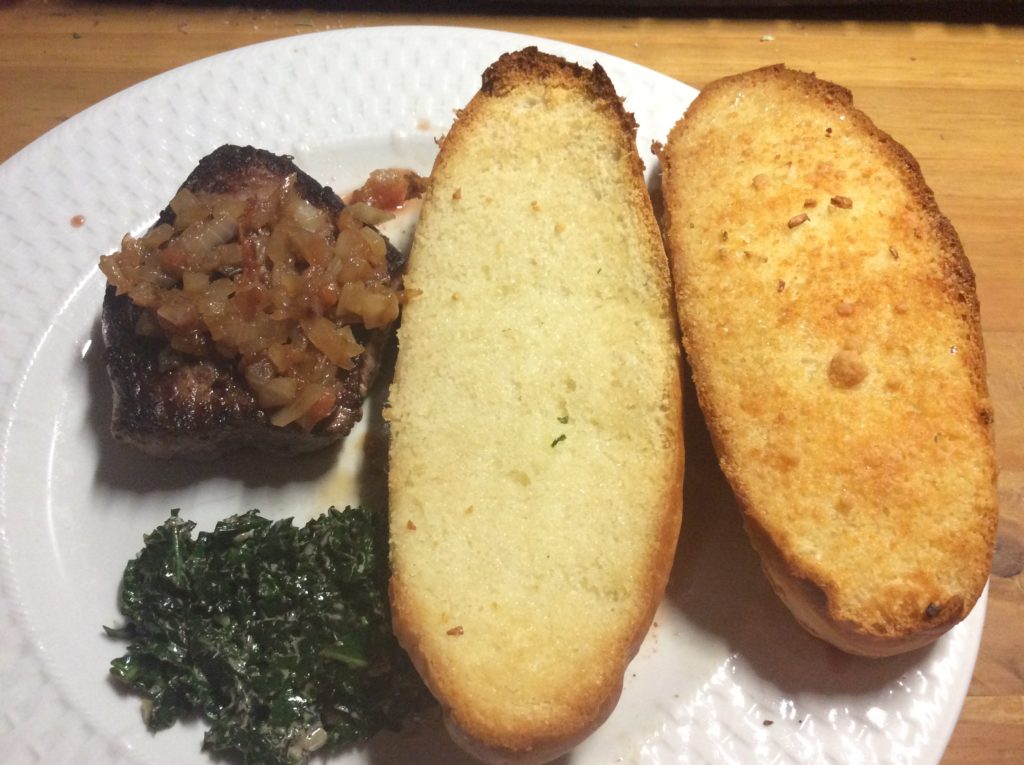
Of the three meals I had, the Steak Tagliata with Tomato Jam, Creamy Kale and Garlic Bread (a premium kit) was by far the best and as good as any meal I’ve gotten in a meal kit. The beef was ranch steak, a cut I’ve mostly gotten in meal kits, and it was tender and delicious – certainly a cut above the meat I get at Safeway. I also very much enjoy the tomato jam. It was easy to make and delicious. There was too much of it for the steak – but I liked it so much that I ate it by itself.

The garlic bread consisted of two buns (they called them demi baguettes but they had a sweeter, softer consistency – they were clearly buns); each was individually wrapped in sealed plastic. They were surprisingly good as well.

Finally, while I didn’t like the kale – not a surprise, as I don’t like most vegetables – my 14-yo ate it.

The portion size was just right, neither of us were left hungry – though it may have been because of how much garlic bread we got.

The ingredients were mostly fine, though the garlic was old and it came already sprouting. The tomato wasn’t ripe when it arrived, but it was just right two days later when I actually cooked this meal. Of course, by then the kale was just starting to dry out.

Note, this meal kit requires the use of your own butter – most more expensive kits include it.

I got this kit for free, with a special one-time code that someone gave me. The regular cost for this two serving kit is $19, including shipping. Use this link to get $20 off your first box.

RECIPES

Tomato Jam

  • 1 Tbsp olive oil
  • 1 small yellow onion, chopped
  • 1 Roma tomato, chopped
  • 1 Tbsp balsamic vinegar
  • 1/4 cup water
  • 1/2 tsp sugar
  • salt & pepper to taste

Pour oil in a saute pan and heat over medium-high heat. Add the chopped onion and cook until softened, stirring often. Add the tomato, vinegar and water. Cook, stirring frequently, until very soft – about 4-5 minutes. Stir in the sugar. Season with salt & pepper. Turn off heat and serve as a relish.

Vegan Chocolate Tart

This year, I made a beautiful chocolate tart for dessert for my Christmas Eve dinner – and that meant I had to make a vegan alternative for my vegan daughter. This recipe had great reviews, so I decided to make it for her. It took some doing, as the recipe called for Medjool dates and a specific brand/type of chocolate, which the recipe-maker insisted was just the best. Only after I’d searched for and found the chocolate (at Walgreen of all places) I realized that her post was actually sponsored by that chocolate brand. As it turned out, this chocolate was probably too dark for this cake. It would have probably worked best with 50-60% cocoa content chocolate. Just make sure you look at the ingredients to make sure it’s vegan.

Medjool dates are a particularly sweet type of dates that cannot be substituted by regular ones. Neither of my local supermarkets carried them but I was able to find them at Trader Joe’s (I think).

As other chocolate tart, this tart is beautiful when topped with fresh berries and mint leaves – which also provide a nice light tart contrast to the very rich chocolate.

Ingredients

For the crust:

  • 8 pitted Medjool dates
  • 1 cup peeled almonds
  • 1 oz semisweet vegan chocolate, chopped and melted
  • 1 Tbsp coconut oil, melted
  • pinch of salt

For the filling:

  • 3.5 oz semisweet vegan chocolate, chopped
  • 1/4 cup coconut oil
  • 1 cup coconut cream
  • 8 pitted Medjool dates
  • 1 tsp vanilla extract

Instructions

Put the dates and almonds in a food processor and process until the mixture is very fine. Add the melted chocolate, melted coconut oil and salt and process until they are fully incorporated.

Press the mixture onto the bottom and sides of a tart pan. Place in the refrigerator and cool until the crust has set.

Meanwhile, make the filling.

In a small saucepan, melt together the chocolate and coconut oil. Mix in coconut cream. Transfer to a clean food processor bowl. Add dates and vanilla extract. Process until all ingredients are combined and have a smooth, pudding-like consistency.

Add the filling to the crust. Refrigerate until set, about 2 hours.

Top with berries, mint and whipped coconut cream, if desired.

Adapted from Regina’s recipe at Leelalicious

Braised Leeks with Lemon

I love leeks and this recipe did not disappoint – when I first made it. The leeks were delicious and melt-in-your-mouth. I loved them. However, I made them in advance for my 2018 Christmas Eve dinner and they didn’t reheat well (on the stove). They were less flavorful and the consistency was not nearly as good. Indeed, practically nobody ate them. So make them, but don’t make them in advance.

This recipe will serve 2, increase quantities as needed.

Ingredients

  • 3 large leeks
  • 2 Tbsp unsalted butter
  • 1/4 cup chicken broth
  • 1 tsp. freshly grated lemon zest
  • 4 small or medium leeks, tough outer leaves discarded and leeks trimmed to about 7 inches long and cut lengthwise into quarters or eightDirections

Directions

Trim leeks, discarding roots, leaves and tough outer leaves. Cut each leek into 1″ pieces. Place in a bowl with water for 15 minutes, making sure to remove any grit.

Heat butter in a saute pan over medium heat. Transfer leeks from the bowl to the pan – do not dry. Cook the leeks for five minutes, stirring occasionally. Add broth and lemon zest. Cover the pan and braise leeks until very tender, around 5 minutes. Season with salt and pepper.

Adapted from a recipe at Epicurious.com

Mushroom Wellington (Vegan)

To my great amazement, several commercial puff pastries are vegan – so once I decided to make Beef Wellington as the main dish for my 2018 Christmas Eve Dinner, I knew it wouldn’t be hard to find a vegan version of Wellington. There were actually many different versions, with all sorts of fillings, but this recipe for mushroom Wellington looked and sounded amazing – and my vegan daughter is very fond of mushrooms. She was very, very happy with it and ate all the leftovers.

I followed the recipe closely, though I used a very small amount of baby spinach, given that she doesn’t like it. If you want to follow the recipe exactly, use 10 1/2 oz (though really, that’s way too much even if you like baby spinach).

Ingredients

  • 4 large portabello mushrooms
  • 3 Tbsp. olive oil
  • 3 large onions, chopped
  • salt and pepper to taste
  • a handful of baby spinach leaves
  • leaves from 4 sprigs of fresh thyme
  • 1 sheet vegan puff pastry
  • 1 Tbsp. dijon mustard
  • 1-2 Tbsp vegan egg wash

Instructions

Clean mushrooms and trim the stalks. Set aside.

In a large saute pan, heat 1/2 Tbsp olive oil over medium-low heat. Add the chopped onion and reduce heat to low. Season with salt and pepper and saute until the onions are golden brown, around 15-20 minutes, stirring occasionally. Using a slotted spoon remove onions from the pan and set aside.

Add the spinach to the hot pan and cook until wilted, a minute or two. Remove spinach from the pan and let cool.

Add the remaining olive oil to the pan and increase heat to medium-high. Add the mushrooms top-side down and cook until they start to brown, around 5 minutes. Remove mushroom caps and place, top side up, on a thick stack of paper towels to cool – they will release A LOT of liquid.

Refrigerate the onions, spinach and mushrooms until cool.

Flour a working surface and rolling pin and roll puff pastry sheet until it’s the desired thickness and length – long enough to accommodate the four mushroom caps. Spread half of the onions in the middle of the pastry sheet, leaving a 3/4″ border on the top and bottom. Place half of the wilted spinach on the onions. Spread dijon mustard over the mushroom caps and season with salt and pepper. Place mushrooms, tops down, on the spinach. Sprinkle thyme leaves on the mushrooms. Cover with the remaining spinach and onions. Carefully, roll the pastry on top of the mushroom mixture, forming a log. Press down on the edges to seal. Turn over and brush with the vegan egg wash. Envelope the log in plastic wrap and place in the refrigerator for at least an hour.

Preheat oven to 400F. Place parchment paper on a baking sheet. Unwrap the log and place it on the parchment paper. Place in the oven and cook for 30 minutes. Reduce oven temperature to 350F and bake for 10 more minutes. Remove from the oven and let rest for 15 minutes before serving.

Adapted from Nicole’s recipe at Delicious Every Day.

Vegan Egg Wash

I made this vegan egg wash to brush on the mushroom Wellington I made for Christmas Eve Dinner. It worked beautifully. The aquafaba is the water from a can of chickpeas. You can use the chickpeas as a snack.

Ingredients

  • 1Tbsp aquafaba
  • 1 Tbsp unsweetened almond or cashew milk
  • 1 Tbsp vegetable oil
  • 1/2 tsp maple syrup or brown rice syrup

Instructions

Whisk all ingredients together. Brush over pastry requiring an egg wash.


Adapted from Nicole’s recipe at Delicious Every Day.

Apple and Calvados Sorbet

I made this sorbet as a palate cleanser for my 2018 Christmas Eve dinner. It worked quite well, but it was too alcoholic tasting for the kids. I think it would have been just as lovely if frozen without the apple brandy, and the liquid before freezing would actually make a very nice drink.

I used a cheap apple brandy because it was 1/4th the cost of Calvados and it got good reviews as far as apple flavor went. It was really very apple-y, though still pretty strong.

Ingredients

  • 1 1/3 cup peeled, chopped tart apple
  • 3 cups water
  • ½ cup sugar
  • ¼ cup lemon juice
  • ¼ tsp grated lemon zest
  • ¼ cup Calvados or apple brandy

Directions

Combine chopped apples, water and sugar in a medium saucepan. Heat over medium heat until it boils. Cover, lower heat to medium-low and simmer for 15 minutes or until the apples are very tender. Remove from heat and let cool.

Add the lemon juice, lemon zest and apple brandy and mix well. Transfer to a bowl and refrigerate until very cold, at least 2 hours. Transfer to an ice cream maker and process following manufacturer’s instructions. Transfer to a covered bowl, place in the freezer until it has the desired consistency.

Adapted from Rebecca Franklin’s recipe at The Spruce Eats.

Vegan Chestnut Soup

My daughter is vegan so, for my 2018 Christmas Eve dinner, I made both a regular chestnut soup and a vegan one. My daughter was rather pleased with this recipe.

Ingredients

  • 3 Tbsp vegan butter or olive oil
  • 1 carrot, finely chopped
  • 1 rib celery , finely chopped
  • 1 onion , finely chopped
  • 6 cups vegetable broth
  • 1/4 cup fresh parsley, chopped
  • 1/4 tsp ground cloves
  • 2 bay leaves
  • 12 ounces cooked chestnuts
  • 1/4 cup unsweetened soy, almond or cashew milk
  • Salt and pepper, to taste

Directions

Heat butter or oil over medium heat in a large pot. Add the carrot, celery and onion, reduce heat, and saute over medium-low heat until very soft, about 10 minutes, stirring occasionally.

Add the vegetable broth and stir. Add the parsley, ground clove, bay leaves and chestnuts. Stir, raise heat to high and bring soup to a boil. Cover, reduce heat to medium low and simmer for about 30 minutes.

Remove and discard the bay leaves. Using an immersion blender, puree until smooth. Alternatively, transfer to an electric blender and puree – you may need to do this in batches. Return soup to the pot and add the soy milk. Stir well and warm over medium-low heat.

Taste, season and serve.

Adapted from Jolinda Hackett’s recipe at The Spruce Eats.

« Older posts Newer posts »

© 2025 Marga's Food Blog

Theme by Anders NorenUp ↑

RSS
Follow by Email
Pinterest
fb-share-icon
WhatsApp
FbMessenger